Configure Swagger UI
Configure the Swagger UI.Interface to consume the generated documents
To configure the Swagger UI, spec path along with the name of the spec must be passed in the SwaggerEndpoint() method within the UseSwaggerUI() extension.
public class Startup
{
    public Startup(IHostingEnvironment env, IConfiguration configuration){... Omit for brevity ...}

    public void ConfigureServices(IServiceCollection services){ ... Omit for brevity ... }

    // This method gets called by the runtime. Use this method to configure the HTTP request pipeline.
    public void Configure(IApplicationBuilder app, IHostingEnvironment env)
    {
        app
            .UseMvc()
            .UseSwagger()
            .UseSwaggerUI(c =>
            {
                //Display the OperationID (ActionName) in the UI
                c.DisplayOperationId();

                //Load the document generated by AddSwaggerGen() inside ConfigureServices()
                c.SwaggerEndpoint("v1/swagger.json", "Menu (version 1)");
            });
    }
}
The above snippet registers the v1/swagger.json in the UI. Once the UI is loaded, the documents registered by SwaggerEndpoint() will be loaded.
For registering multiple spec versions, simply register multiple document generations by calling the .AddSwaggerGen(c => ...) multiple times, changing just the document filter from /v1 to the version desired.
From:
SwaggerDoc("v1", new Info());
c.DocumentFilter<VersionPathFilter>("/v1");

To:
SwaggerDoc("v2", new Info());
c.DocumentFilter<VersionPathFilter>("/v2");
And register the new endpoint in the UI like below:
app
    .UseMvc()
    .UseSwagger()
    .UseSwaggerUI(c =>
    {
        //Display the OperationID (ActionName) in the UI
        c.DisplayOperationId();

        //Load the document generated by AddSwaggerGen() inside ConfigureServices()
        c.SwaggerEndpoint("v1/swagger.json", "Menu (version 1)");
        c.SwaggerEndpoint("v2/swagger.json", "Menu (version 2)");
    });
When multiple versions are available, might be useful to register a general spec with all endpoints
SwaggerDoc("all", new Info());
//c.DocumentFilter<VersionPathFilter>("/v2"); //Remove the filter
Annotate controllers with endpoint details to group in the right spec. OpenAPI uses the concept of tags to group endpoints related to the same resource type, each tag will represent a group in the swagger ui.
By default, Swagger doc generation creates a tag using the controller name. This way, multiple actions(endpoints) found inside the same controller will be grouped in the same tag.
The problem with this approach is that makes it harder to group endpoints if they are located on different controllers. To avoid this problem, Swagger can be configured to group the endpoints by ApiGroup.
ApiGroup is a concept introduced in ASP.NET Core. It requires the controller to be decorated with the attribute ApiExplorerSettingsAttribute, the GroupName to be set to the Tag expected in swagger as below.
[ApiExplorerSettings(GroupName = "Category")]
public class AddMenuCategoryController : ControllerBase { ... actions ... }
To group api endpoints by something other than the default group, change the c.DocInclusionPredicate() filter used in the default group, otherwise the endpoints won't be included in the docs.
To group endpoints pass the group predicate to the method c.TagActionsBy().
The following code has to be added to the swagger doc generation:
services.AddSwaggerGen(c => {

    //By Default, all endpoints are grouped by the controller name
    //We want to Group by Api Group first, then by controller name if group not provided
    c.TagActionsBy((api) => new[] { api.GroupName ?? api.ActionDescriptor.RouteValues["controller"] });

    //Include all endpoints available in the document
    c.DocInclusionPredicate((docName, apiDesc) => { return true; });
});
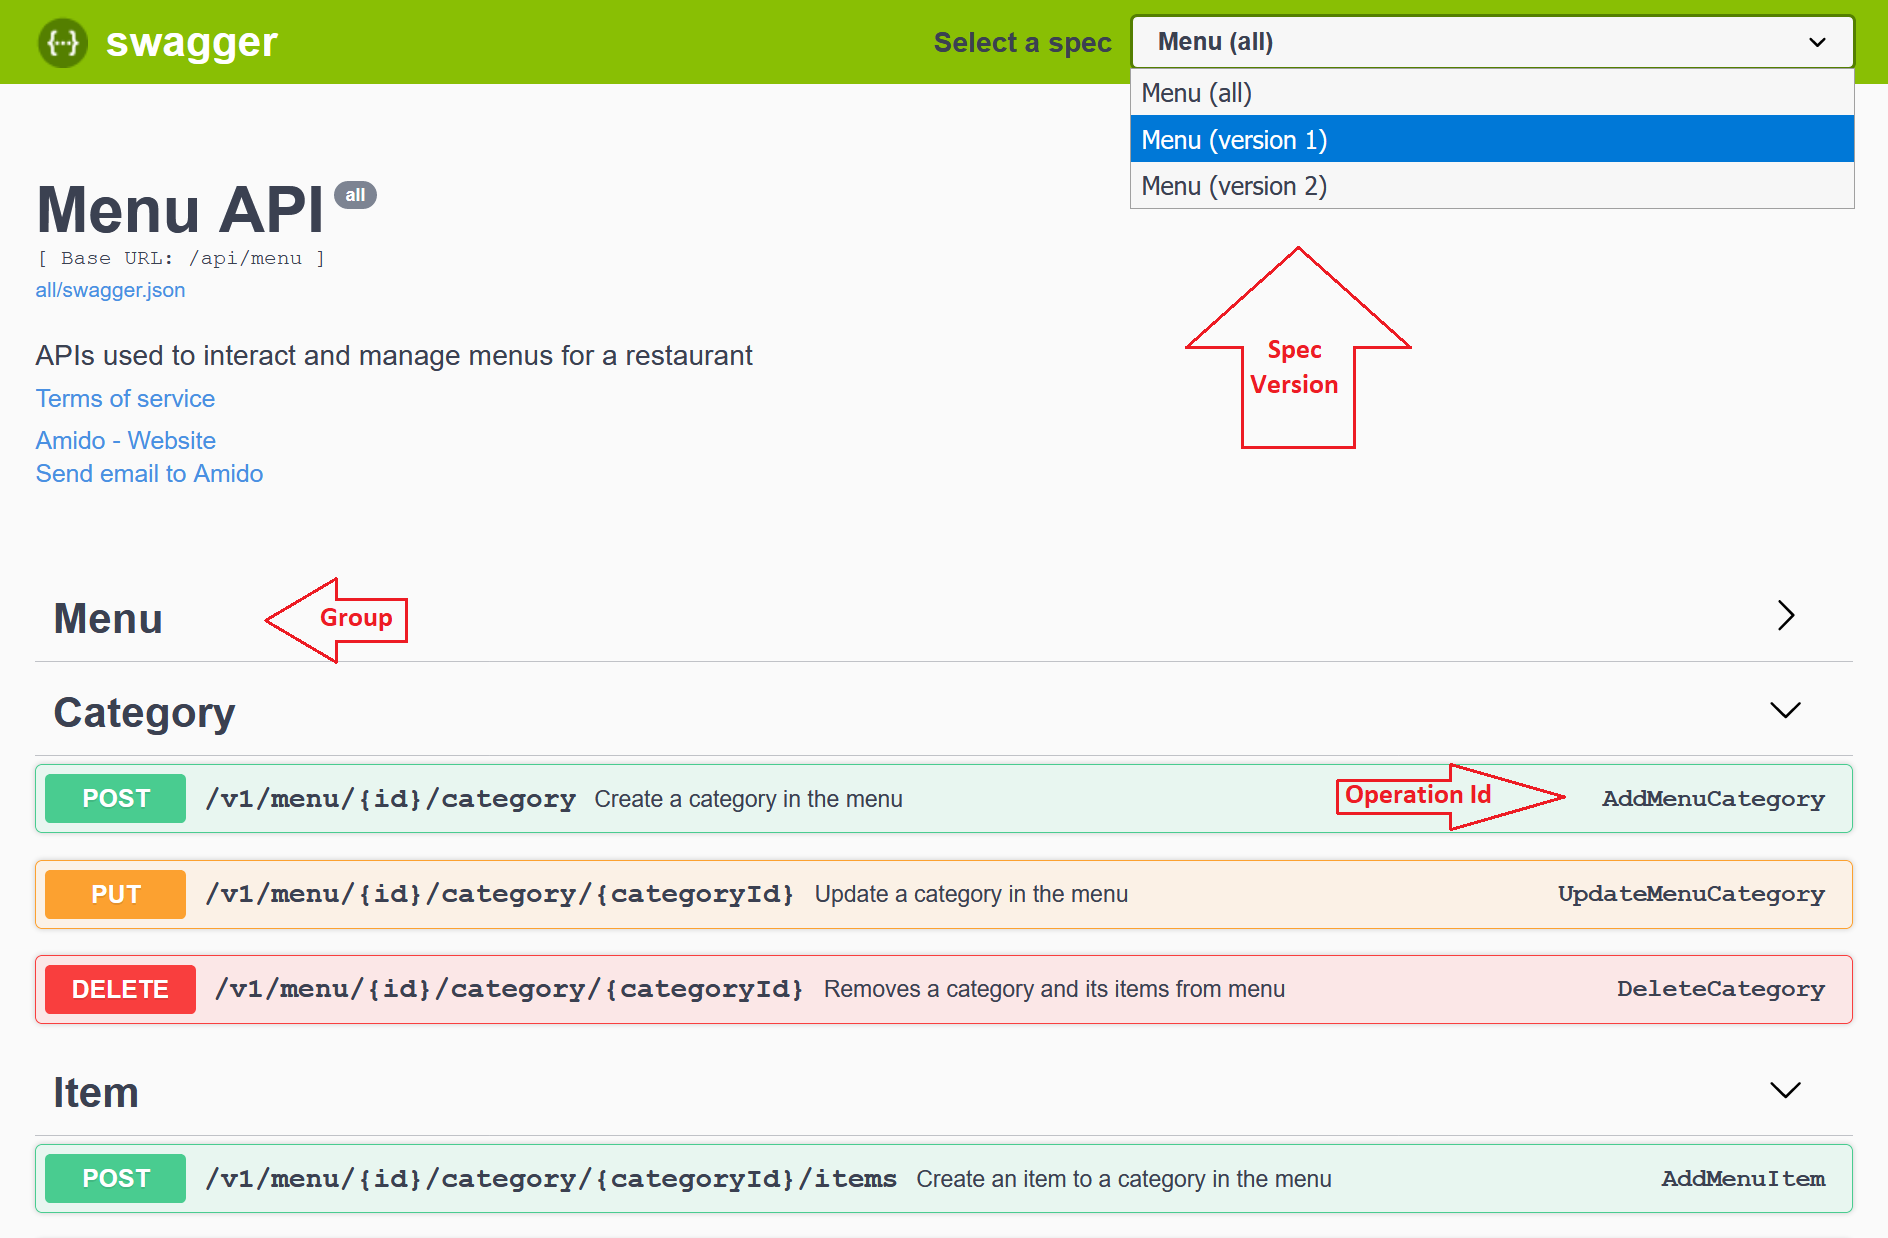
The swagger configuration is complete and the swagger ui should be available as below.