Azure DevOps Pipeline
The pipeline will automate provisioning and updating the core infrastructure in Azure. This page assumes you have already completed the steps on the core infrastructure page.
The Azure infrastructure source code.
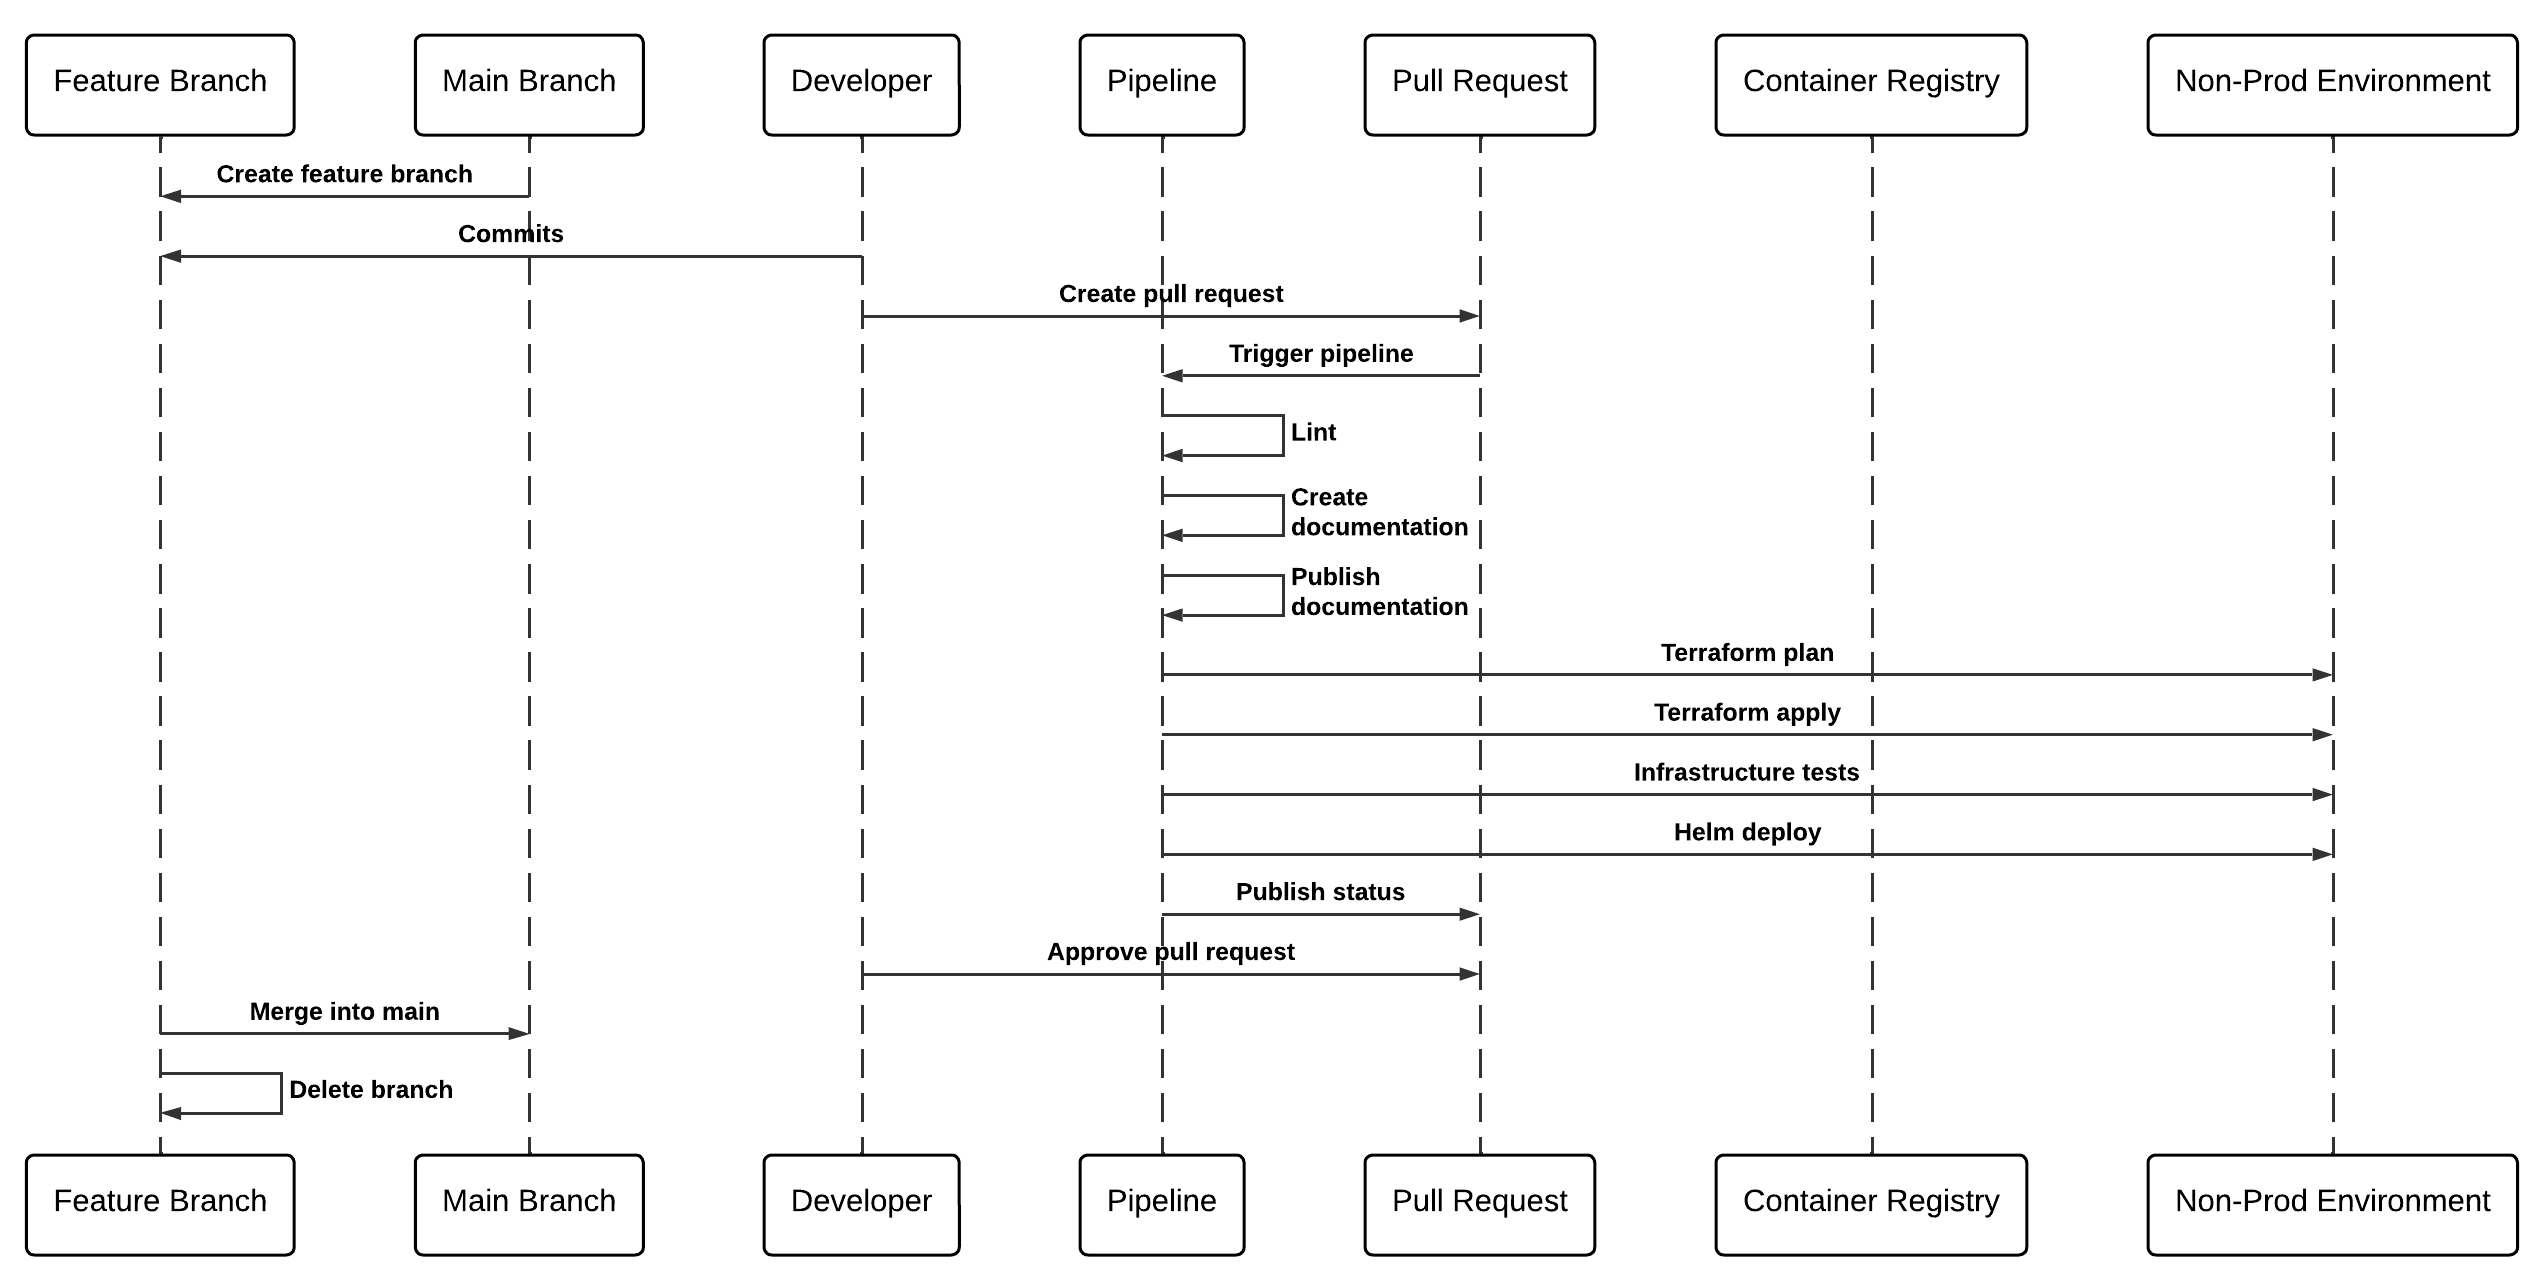
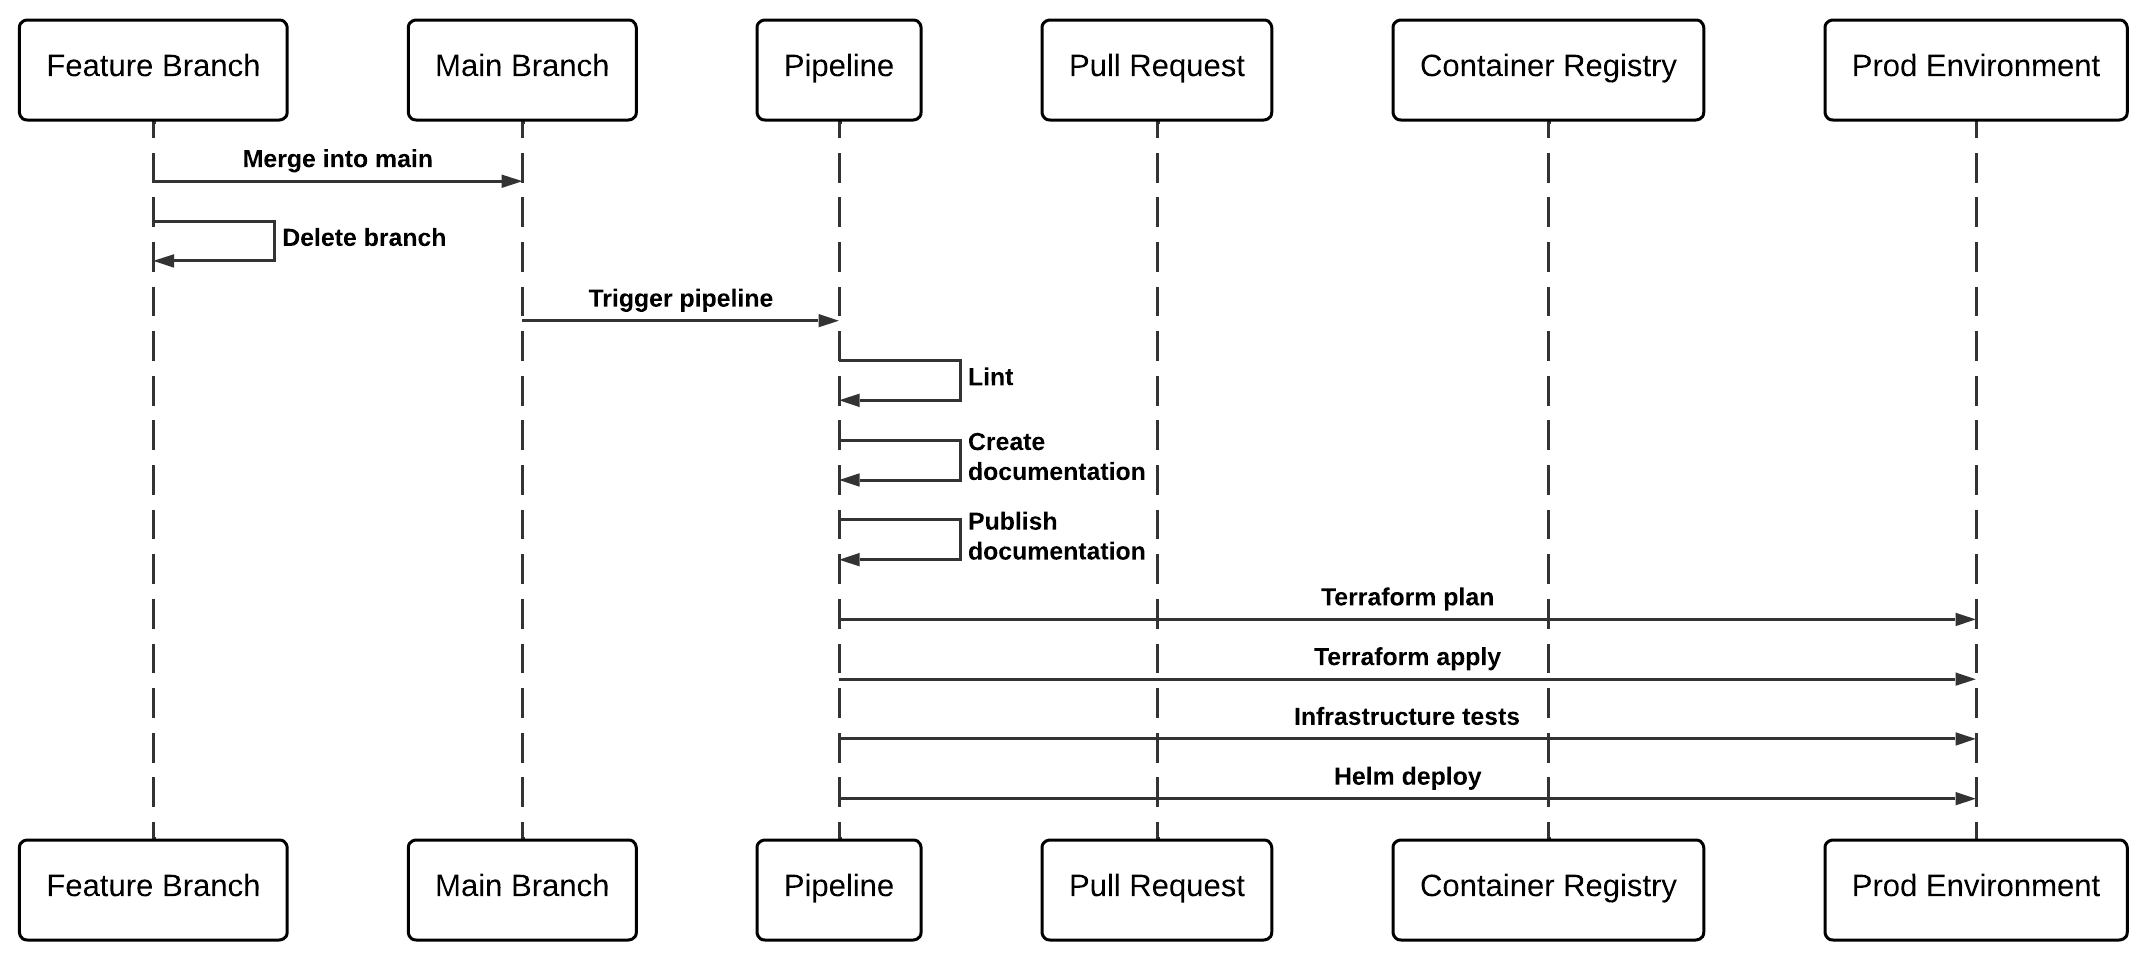
Pipeline Diagram
Feature branch -> Non-Prod sequence
Main branch -> Prod sequence
Setting up Azure DevOps
Variable groups
Variable groups will need creating for storing Azure Credentials to be used with the pipeline. Instructions for creating a variable group.
Create a variable group called azure-sp-creds, add a description and make sure the Allow access to all pipelines option is checked. Add the following variables using the Service Connection details from bootstrapping the Azure tenant:
Add the following variables:
| Variable Name | Description | Required for |
|---|---|---|
| ARM_CLIENT_ID | Azure Service Principal Client ID | Terraform and Helm deployments |
| ARM_CLIENT_SECRET | Azure Service Principal Client Secret | Terraform and Helm deployments |
| ARM_SUBSCRIPTION_ID | Azure Subscription ID | Terraform and Helm deployments |
| ARM_TENANT_ID | Azure Tenant ID | Terraform and Helm deployments |
Update pipeline template placeholders
Where possible, the Stacks CLI will have populated the correct values in the pipeline template file build/azDevOps/azure/pipeline-vars.yml. We very much recommend that you go through the whole template to make sure that values are correct for your project. Once you are happy with the template, commit the changes to your repository.
Create the pipeline
Follow the steps below to create the pipeline and trigger the initial run.
Please note that pipeline will create DNS zones for both nonprod and prod (by default, nonprod.${BASE_DOMAIN} and prod.${BASE_DOMAIN}). These will need NS records adding to the base domain and will cause the pipeline to fail on the initial run.
- In the pipelines section of Azure DevOps, select New Pipeline.
- Select your repository.
- Select the Existing Azure Pipelines YAML files option and enter the path
build/azDevops/azure/infra-pipeline.yml - Click run and wait for the pipeline to run. The
Terraform: Applystep is expected to fail with an error containing:One or more domains had a problem. - In the Azure Portal, located the DNS zone created and make note of the NS values.
- Add an NS record set to the base domain DNS using the same name as the newly created DNS zone and the NS values noted.
- Re-run the pipeline in Azure DevOps.
- Repeat steps 5, 6 & 7 for the prod DNS zone.